Thursday, January 14, 2010

Information on WGA Validation Tool (KB892130), WGA Notifications (KB905474) and Office Genuine Advantage (OGA)

Microsoft has launched Windows Genuine Advantage (WGA) and Office Genuine Advantage (OGA) to help reducing the piracy issues. What they does is by lauching an ActiveX control to check if the running genuine and non-pirated version of Windows and Office. For genuine Microsoft software users, they can access Genuine Advantage offers and latest updates and features for the software.

Windows Genuine Advantage currently consists of two main components:

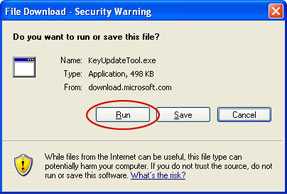
Windows Genuine Advantage Validation Tool which deployed by KB892130 and install an ActiveX control LegitCheckControl.dll, LegitcheckControl.inf and GWFSPIDGen.dll to \Windows\System32 directory. WGA Validation Tool performs a validation check to verify that your copy of Windows is genuine when you try to download a program or software that is marked with the WGA icon WGA Icon from Microsoft Download Center or when you try to access updates on the Microsoft Windows Update Web site. You will be asked to install and complete the validation process if you still do not have KB892130 installed. The client side Windows Validation Assistant component for Windows Server 2003 is 20 KB and for Windows XP is 344 KB.

Microsoft says Windows Validation Assistant does not collect any personal data from the computer, and the following information that is gathered from Windows machine to determine if your Microsoft software is genuine during the validation process:

* Windows product key or product ID
* Windows service pack version
* PC manufacturer and model
* Operating System version
* SKU and Suite Mask
* Security ID
* PID/SID
* BIOS information (manufacturer, model, make, version, date)
* BIOS MD5 Checksum
* User locale (language setting for displaying Windows)
* System locale (language version of the operating system)
* Office product key (if validating Office)
* Hard drive serial number

According to Microsoft, the information collected will be used for three purposes:

  • Provides Web page flow, tailoring the pages you see based on your responses.
  • Conveys demographics, which help Microsoft to understand regional differences in Windows or Office usage.
  • Confirms user input and compared user input against data collected from the PC in order to determine whether to grant a user’s request for additional access.

Windows Genuine Advantage Notifications or WGANotify is deployed by KB905474 which will display notification messages at the frequency that is determined at installation stage, if your computer failed the Windows Genuine Advantage validation process and running a copy of Windows XP that is not genuine. According to Microsoft, the WGA warning messages will appear at the following locations:

1. Logon notification

When you log on to a non-genuine copy of Windows XP, you receive the following logon notification error message:

You may be a victim of software counterfeiting. This copy of Windows is not genuine and is not eligible to receive all updates and product support from Microsoft.

Click Get Genuine now to get more information and resolve this issue.

When receive this message, you’re offered two options:

Get Genuine to start the Get genuine Windows process or,
Resolve Later which will make an icon appears in the notification area that when you double-click on it, will launch the Get genuine Windows process.

2. Balloon notification

After you log on to a non-genuine copy of Windows XP, a balloon notification message is displayed in the notification area reminding you about the validation failure. Click on the balloon notification or the notification area icon will open the Windows Genuine Advantage Validation Failure Web page that tells you the specifics of the validation failure and the steps that you can take to make the operating system genuine.

3. Desktop banner text

If you use the Resolve Later option, and manage to logon to a non-genuine Windows OS, the following banner text appears on the locked desktop:

This copy of Windows is not genuine.
You may be the victim of software counterfeiting

KB905474 contains 2 files that’s WgaLogon.dll and WgaTray.exe (it may update LegitCheckControl.dll too) which will be installed automatically by Automatic Updates, although KB905474 itself is (still) an optional update. Which means that you can unselect KB905474 from the list of updates and skip installing it.

WGA Notifications has found to be contact with Microsoft server everytime you boot up and start the Windows PC. According to Microsft, the process is to check whether a newer settings file is available and download the file if one is found. The settings file gives Microsoft the ability to update how often reminders are displayed and to disable the program if necessary, although this scenario not likely. The operation is limited to the download of new settings file and no other system information is sent other than standard server log informatio, unlike validation which sends system information to Microsoft.

Microsoft has completed the pilot phase for WGA Notifications, and officially rolling out the anti-piracy reminders to Windows XP users worldwide as of 28th June 2006 in version 1.5.540.0, with minor changes to the program in response to customer concern regarding its “phone home” functionality. WGA Notifications KB905474 no longer checks a configuration file located on Microsoft’s servers, but the program will still communicate with the company periodically, with the frequency varies depending upon license type, which may typically takes place every 90 days. According to Microsoft, the information sent to Microsoft allows it to update the list of bad product keys, and ensure that newly discovered counterfeits are not proliferating.

Office Genuine Advantage (OGA) meanwhile is an attempt by Microsoft to validate genuine copy of Microsoft Office XP, Office 2003, Office 2007, Office 2010 or newer. By validating the Office, you can access to the latest features, updates, and support, including Office Genuine Advantage offers that contains add-ins, templates, learning tools, Smart Tags and stationery.

OGA Office validation involves downloading of an ActiveX control called Office Genuine Advantage Validation OGACheckControl.dll, previously known as Office Validation Assistant (OVA) which will scan your computer to verify and determine whether your copy of Microsoft Office XP or Microsoft Office 2003 is genuine. You need to access the Genuine Microsoft Software: How To Tell webpage to access it.

Currently, OGA validation is recommended but not mandatory. Although still optional, Microsoft may make Office Validation to be required in future. According to Microsoft, should Office Validation become required in the future, only users of Office suites will likely be required to validate.

As of October 2006, Microsoft has made OGA mandatory required check, and subsequently rolled out Office Genuine Advantage Notifications, which displayed notification message on system running illegal copy of Office much like WGA.

Easily Change Product Key with Windows Product Key Update Tool Free Download

There is a lot of tools and utilities that allow you to change product key or CD key of Windows XP to another product key, possibly genuine, legit and valid, or volume license key (VLK) if you or your company just switch to volume licensing arrangement. However, Microsoft has provided its own tool to change Windows Product Key, which supposedly to be most reliable and won’t mess up your system. The main purpose is to allow customers who purchased Get Genuine Kit to change their product key easily to OEM product key enclosed in certificate of authenticity (COA) label. So, if you’re using cracked or pirated Windows operating system, avoid this Windows Product Key Update Tool at all cost.

According to Windows Product Key Update Tool instructions, Windows Product Key Update Tool will make changes to your Windows installation to update your product key. In addition, the product key update tool will scan a number of key Windows files to determine if they have been tampered with. In other words, the Update Tool actually perform a Genuine Windows Advantage validation on your system, and the information will be sent back to Microsoft, together with the file tampering scan results.

To update your product key by using Windows Product Key Update Tool, follow these steps:

  1. Download Windows Product Key Update Tool (KeyUpdateTool.exe) from Microsoft.
  2. Select Run when prompted.

    Run Windows Product Key Update Tool

  3. Enter the product key found on your COA where requested, and then click Next to begin the update.

    Change Product Key

  4. Once the update is complete, click Finish to restart your computer. When your computer restarts, your computer’s product key will match the COA product key. If this tool fails to change your product key to match your COA, contact Microsoft Support.

    Restart Computer

  5. After updating your product key you will be required to activate Windows. Once Windows is activated, you can verify that your copy of Windows is genuine by going to http://www.Microsoft.com/genuine and clicking Validate Window

WinGuggle Free Download to Get Vista Product Key or Change OEM Logo and Performance Index Score

WinGuggle is a small application that can retrienve and get Windows Vista Product Key (also known as CD-Key) easily from the registry. Normally you won’t need WinGuggle, unless you have dislocate or misplace your original Windows Vista DVD disc or its licensed product key, and need to recover and view the product key from the installed Vista for backup.

WinGuggle

Other than getting Windows Vista product key back from registry, WinGuggle also can change OEM logo and OEM information, and also Windows Experience Index score in Performance Information and Tools.

Note that OEM manufacturer’s factory installed product key (normally comes with Vista system that is already pre-activated) cannot be used to fresh or clean install Vista. In this case, your personal Vista product key is located on the COA sticker attached on the computer, and using WinGuggle to view OEM product key is useless.

WinGuggle does not require installation. To run WinGuggle, just unpack the archive and execute and application.

Download WinGuggle.

Easily Change Product Key with Windows Product Key Update Tool Free Download

Occassionally some Windows Vista user may need to activate his or her copy of Windows Vista operating system through phone activation, such as in situation where the computer is offline without Internet access. Other possible reason to use phone to activate instead of automatic online activation is failure or facing problem to activate Vista online, and user have to fallback to alternative.

Windows Vista customer normally have to activate all editions of the OS through Microsoft’s activation server, with the exception of preinstalled OEM (recovery) copies of Vista. For OEM version of Windows Vista, Microsoft no longer provides any support. User must contact the OEM to activate the OS, where the contact information should be included in the support documentation that came with your computer or OEM Vista installation CD/DVD package. However, an OEM (retail) version of Windows Vista installation DVD that is bought separately and did not come preinstalled on a OEM computer is still supported by Microsoft.

For most users, activation process normally starts with attempt to activate Vista online. Online activation is simple and effective way to activate the copy of installed Vista, and when it fails or cannot activate successfully, then user can opt to activate by phone. If you want to skip and bypass online activation and go straight to activate Vista by phone (i.e. in the case of offline PC with no Internet connection, do these steps:

  1. Click on Start Menu.
  2. Type slui.exe 4 into Start Search, and then press Enter.
  3. Go to step 10.

Normal activation procedures for Windows Vista, including fallback on phone activation:

  1. Click on Start Menu.
  2. Right click on Computer and then click Properties, or open the Control Panel -> System and Maintenance -> System icon.
  3. Scroll down to the Windows activation section and click on the Activate Windows now link.

    Activate Windows Vista

  4. Click on Activate Windows online now.

    Activate Windows Vista Online

    Note: If you have not entered a product key during installation, the wizard will ask for a genuine serial key. If you uncertain of the serial number key used, or want to change the key used, click on Change product key link.

    And, this step must fails in order to go to phone activation.

  5. If the online activation process, user can continue to attempt to activate using automated phone system by clicking on Use the automated phone system to activate option.

    Windows Vista Phone Activation

  6. Select your location and click on Next button when prompt to find available phone numbers for activation.

    Select Location for Activation Phone Number

  7. Click Continue if prompted with UAC dialog box, except for those who had disabled UAC.
  8. A local phone number or nearest telephone number will be displayed on screen, together with a set of Installation ID (54 numbers in total – 6 numbers in 9 groups) generated by Windows.
  9. Call the activation phone number.
  10. The call will be answered by automated voice response (AVR) system, that asked caller to speak, or if voice recognition failed, press the phone button to enter the Installation ID listed behind “Step 2″. The numbers needed to enter is a lot (54). If you want simpler way to do it, just speak and enter anything to let automated service fails, and then wait for the call to transfer to activation operator (a real human). Sometimes, if for some reason the Installation ID entered is not accepted by the AVR, your call may be transferred to human operator too.

    Confirmation ID for Phone Activation

    Note: The human operator may ask for the reason that causes requirement of reactivation or activation of Vista. Just tell the truth, e.g. hardware upgrade, transferring to new PC (for non-OEM edition only) and etc (see activation FAQ).

  11. No matter who you talk to (machine or human CSO), a set of Confirmation ID numbers which consists of 48 digits (6 numbers in 8 groups) will be given if Microsoft believes that your copy of Windows Vista is genuine and legitimate.

    Write down the Confirmation ID.

  12. Back to Windows Vista, type in the Confirmation ID given by the phone system into the wizard boxes after the “Step 3″, and then click on Next button.
  13. The activation should be successfully done with Activation was successful window appears. Click on Close button to quit.

    Successful Activate By Phone

View and Retrieve or Change Windows (XP, Vista, 2003, 2000 and more) and Office (XP, 2003, 92) Product Key or CD Key

The Windows computer may come preinstalled with Microsoft Windows operating system and Microsoft Office productivity suite, and the user may not even see or access to the product key or CD key that needed to install Windows OS and Office System, and to make sure that the products are genuine. You may simply want to write down and safekeep the Windows and/or Office product CD key or serial number for future usage or for documentation purpose, as the key is as good as license to use Windows and Office. Or you want to get back the CD key that has been forgotten before reinstalling Windows or Office. There are a few tools and utilities that allows you to easily and quickly retrieve the Windows product key and Office CD key or serial number. Some of them has the ability to change the serial key too, in case you need to modify the product key in Windows due to case like 326904 error “The Product Key Used to Install Windows Is Invalid” or incorrect product license key.

Magical Jelly Bean Keyfinder

Magical Jelly Bean Keyfinder is a freeware and free download that let users view and retrieve the product Key or CD key used to install Windows and Office from the registry. Magical Jelly Bean Keyfinder currently able to support and reveal product CD key from Windows 95, Windows 98, Windows ME, Windows NT 4.0, Windows 2000, Windows XP, Windows Server 2003, Windows Vista. For Office, it supports retrieval of product key or CD key or serial number for Office 97, Office XP and Office 2003.

Magical Jelly Bean Keyfinder can be downloaded here or directly download the current version 1.51 of Keyfinder.

Best of all, Magical Jelly Bean Keyfinder also supports changing the Windows Product Key without reinstall Windows to another product key or CD key or COA in Windows 95, 98, ME, and XP.

Windows Product Key Viewer & XP/98 Key Changer (Demoware)

Windows Product Key Viewer/Changer can recover lost product keys on an installed and activated Windows XP including Service Pack 2, Windows 98, Windows ME, Windows NT, Windows 2000 and Windows 2003 operating system. It also supports ability to change CD product keys on Windows 98, Windows XP Home and Windows XP Professional without reinstalling Windows.

Keyfinder Thing Lite! and KeyFinder Thing 3

Utility to find serial numbers or product key licenses from more than 150 application software.

CD Key Reader

CD Key Reader is a small utility that can be downloaded and run immediately without installation. CD Key Reader can only retrieve product cd keys for modern Microsoft applications such as Windows or Office.

Windows Genuine Advantage Diagnostics Tool

Official tool from Microsoft means for WGA program. However, it can only show the last 15 digits of the Windows CD key. The tool can be downloaded here.

Windows Product Key Update Tool

Another utility from Microsoft that allows Windows users to change or update the product key of Windows OS. However, if you steal or crack somebody else’s CD key or product key, this tool is not recommended, as the Product Key Update Tool will scan a number of key Windows files to determine if they have been tampered with. If tampered files are discovered, the tool will alert you before continuing. And it will also sending the information back to Microsoft about the file tampering scan and Windows validation information. Windows Product Key Update Tool can be downloaded here with more information and usage instructions.

Win9xProdKey

Win9xProdKey from Vic Ferri reveals CD keys for Windows 95, Windows 98 and Windows Me.

ViewKeyXP

ViewKeyXP, also from Vic Ferri, reveals and shows Windows XP CD key and serial number.

RockXP

RockXP is a free multi purpose utility that allows users to get all Microsoft software serial number, retrieve you Internet connection parameters such as passwords, retrieve MSN login and password, recover XP login and HASH password, display system password (LSA) and generate random password. RockXP also has the ability to change the product key or serial for Windows XP, and automatically hack and crack to bypass the Windows XP Product Activation.

To view and change the Windows XP serial or CD key, simply click on “Windows key” tab, and click on Scan to retrieve the installed product key, and key in the new CD key serial to change the product key.

RockXP can be downloaded here or directly download RockXP 4.0.

Key Checker

A small yet unique tool to find Windows Vista and Windows XP product key or serial number from registry periodically according to the timing set, and log the key found to the screen or file.

AC2T KeyViewer

KeyViewer from AC2T is a free tool that will decode the encoded Windows CD key and Office product key or serial in Windows 98 SE (including other Windows 9x), Windows ME Windows W2K and Windows XP that is stored under “DigitalProductId” registry key under “HKEY_LOCAL_MACHINE\SOFTWARE\Microsoft\Windows NT\CurrentVersion” registry branch. It also supports users to input raw key retrieved from the registry themselves for the tool to decode to readable product key.

The raw key decoding feature is useful is you unable to login or logon to the Windows, but you need to retrieve the Windows product key or serial for reinstallation or other purpose. By using a bootable CD with a registry editor such as Offline NT Password & Registry Editor CD Bootdisk, users can then retrieve the raw key found in ProductId or DigitalProductId registry key by booting up on the CD, and input into KeyViewer for decoding into a valid product key serial.

Download AC2T KeyViewer.

Manually Viewing and Get the Product Key or CD Key in Windows 9x from Registry

Windows product key is stored in plain text in the Registry and in the file system.dat. In Windows 95, Windows 98 or Windows Me. To view and retrieve the CD key, launch registry editor (click on Start -> Run, key in regedit and click OK), and navigate to “HKEY_LOCAL_MACHINE\SOFTWARE\Microsoft\Windows\CurrentVersion” registry branch. Locate the ProductKey in the right pane for Windows 98 and Me, or ProductID for Windows 95 where the Windows CD key serial is stored.

You can also automate the process by creating a batch file with the following commands:

For Windows 98 or Windows Me:

@echo off
start /w regedit /e key.txt HKEY_LOCAL_MACHINE\SOFTWARE\Microsoft\Windows\CurrentVersion
type key.txt|find “ProductKey”>mykey.txt
del key.txt

For Windows 95:

@echo off
start /w regedit /e key.txt HKEY_LOCAL_MACHINE\SOFTWARE\Microsoft\Windows\CurrentVersion
type key.txt|find “ProductID”>mykey.txt
del key.txt

Recover the Product Key or CD Key in Windows 9x without Go Into Windows

To retrieve the Windows 95 or Windows 98 product key without getting into Windows itself, download the key.zip for Vic Ferri, and copy the extracted batch file to a bootable floopy disk. Boot up and computer with the startup floopy disk, and simply run the key.bat (by typing key or key.bat and press Enter) to get the product key. For Windows 95, edit the batch file and replace the word ProductKey with ProductID.

The batch file contains the following commands to retrieve the product serial from system.dat:

@echo off
find “ProductKey” c:\windows\system.dat

If you’re using Windows 95, make sure the lines look like the following:

@echo off
find “ProductID” c:\windows\system.dat

Manual Retrieve Product Key for Windows XP and Windows 2000 from $WINNT$.INF file

$WINNT$.INF located in \Windows\System32 folder is the file that used by Windows installer to perform unattended or automated installs of Windows NT, 2000 or XP. If the file exists, and you have the administrative rights to access the file, the Windows product key can be found and viewed under the section [User Data] (usually at the top), under the name of ProductKey or ProductID.

Serial Change script for XP and XP SP1 or greater

Download save the Serial Change script for XP (XPChangeSerial.vbs) or Serial Change script for XP w/sp1 or greater (XPChangeSerialSP1.vbs). Then execute the vbs script from the command line (you have to go to the location or folder that you save the script in order to run the script) with the syntax:

XPChangeSerial.vbs xxxxx-xxxxx-xxxxx-xxxxx-xxxxx

or

XPChangeSerialSP1.vbs xxxxx-xxxxx-xxxxx-xxxxx-xxxxx

Change Volume Licensing product key for Windows XP SP1 or later with Activation Wizard or ChangeVLKeySP1.vbs/ChangeVLKey2600.vbs WMI script

Microsoft provides a detailed instructions and step by step guides on how to change the Windows XP VLK product key or serial key by using Activation Wizard, or by using WMI script.

Belarc Advisor

Belarc Advisor is the personal computer audit tool that details profile of your installed software and hardware, missing Microsoft hotfixes, anti-virus status, CIS (Center for Internet Security) benchmarks, and etc. Information shown include the Windows product key.

Everest

Everest from Lavalys is a automated network audit, system change tracking, network monitoring solution, system diagnostics and benchmarking solution that will display the Windows product key, among others.

XPPID Windows XP Product Key Modifier

A small application that allows users to easily change Windows XP product key number by entering new valid XP product key into the field provided and the just press the ‘Change Key’ button. Then the application will run the patched activation process so that the Windows is fully activated after reboot.

Download XPPID.

How to Update and Change Windows XP Product Key Manually

Although there are plenty of software applications that can change the product key installed in Windows XP automatically, but some users may prefer to manually change the product key by themselves. Changing or modifying Windows XP product key is not a common practice after installation, especially so if already activated, and that explains why Microsoft didn’t have built-in mechanism to edit the product key used in Windows XP.


However, for some reason such as the need to change the product key to newly purchased genuine product key, especially when the existing installation of OS is pirated or illegal. The situation also happens in big corporations which have volume licensing (VL) agreemnts with Microsoft, which tends to use a same VLK (Volume License Key) or leaked product key to activate all computers. To enter and make use of the new product key does not really require whole fresh re-installation of Windows XP. Follow the hacking guide below to remove and delete current product key used to activate existing copy of Windows XP, and force the OS to prompt user to enter new product key for activation.

  1. Click on Start and then Run.
  2. In the Open text box, type regedit and click OK to run Registry Editor program.
  3. In the left pane, locate and then click the following registry key:

    HKEY_LOCAL_MACHINE\Software\Microsoft\WindowsNT\Current Version\WPAEvents

  4. In the right pane, right-click OOBETimer, and then click Modify.
  5. Change at least one digit of this value in the Value Data to deactivate Windows.
  6. Click Start, and then click Run.
  7. In the Open box, type the following command, and then click OK:

    %systemroot%\system32\oobe\msoobe.exe /a

  8. When the Windows Product Activation window appears, click Yes, I want to telephone a customer service representative to activate Windows, and then click Next.
  9. Click Change Product key.
  10. Type the new product key in the New key boxes, and then click Update.

    If you are returned to the previous window, click Remind me later, and then restart the computer.

  11. For user using OEM system or volume license product key (VLK), repeat steps 6 and 7 to verify that Windows is activated. User should receive the following message:

    Windows is already activated. Click OK to exit.

    For retail Windows XP users, a 30 days registration for activation reminder will appear. User will have to connect to Internet for online registration and activation, or call the local Microsoft activation hotline for phone activation.

Easy Way to Determine If CPU Supports Windows 7 Virtual PC (XP Mode)

Windows Virtual PC and Windows XP Mode (XPM, previously known as Virtual Windows XP or VXP) are two new optional components for specific editions of Windows 7 operating system. Windows Virtual PC is the Virtual PC (VPC) for Windows 7 which allows user to run virtual machines for virtualization with additional features, such as Windows XP Mode, which allows user to access and run applications installed in virtualized instance of Windows XP on Windows 7 host desktop for backward compatibility.

With much improved functionalities, Windows Virtual PC and Windows XP Mode must be tempting many Windows 7 users. However, Windows Virtual PC system requirements (Windows XP Mode is actually just a virtual machine running pre-activated Windows XP which utilizes features of Windows Virtual PC) have been much different from Virtual PC 2007 SP1. The most significant change is the requirement of hardware-assisted virtualization technology (VT) support.

Hardware virtualization technology or VT is built-in natively by CPU processors. In Intel chip, the VT is called Intel VT, while AMD calls it AMD-V. The VT capability in the processor on the computer is built onto the the tiny piece of chip, and cannot be added or removed using any manual process. And even if the CPU features VT, it must be enabled in BIOS.

Most newer CPU includes VT operation by default. However, some older or even current processors available for purchase for DIY or operating on OEM computer may not support VT. When there is no VT support, Windows Virtual PC may fail to install or cannot be powered up and started virtual machine with following error message:

Cannot Windows Virtual PC host process. Check the System event log for more details.

Windows Virtual PC requires hardware-assisted virtualization. There is no hardware-assisted virtualization support in the system.

Hardware Virtualization Support for Windows Virtual PC 7

Instead of browsing through the long list of Intel processor’s feature list or AMD CPU’s feature to confirm the existence or non-existence of VT support, there is an easier way to quickly determine whether there is hardware virtualization system on the system. That’s by using SecurAble, a small utility that display status of CPU maximum bit length, DEP and virtualization support.

SecurAble

Just download and run SecurAble (no installation required). The status of hardware virtualization feature on the CPU processor is quickly display on screen. If it’s a “Yes” or “Locked On”, the Windows Virtual PC and Windows XP Mode can be used properly. If it’s a “No”, then you’re out of luck. However, there is another possibility that the result may display as “Locked Off”, which means the VT support is currently disabled by BIOS. In this case, just restart the computer and access the BIOS configuration to enable and turn on hardware virtualization support. Else you face the following error when try to launch Windows Virtual PC 7 virtual machine.

Virtual machine could not be started because hardware-assisted virtualization is disabled. Please enable hardware virtualization in the BIOS settings and try again.

Hardware-assisted Virtualization Off

Another tool that can be used to detect hardware virtualization support on CPU is HAV Tool from Microsoft.

Hardware-Assisted Virtualization (HAV) Detection Tool Free Download

More and more virtualization product or solution such as VMWare Workstation and Windows Virtual PC now requires Hardware Assisted Virtualization (HAV) CPU feature in order to function properly as allows a virtual machine hypervisor to run an unmodified operating system without incurring significant emulation performance penalties. The largest chip makers, Intel and AMD implement hardware assisted virtualization in their processors as Intel VT (VT-x) and AMD-V respectively. However, not all modern CPU has hardware-assisted virtualization capability built-in though.


For user who want to verify, check, determine or get to know whether his or her PC computer supports hardware-assisted virtualization, there is a software utility named SecurAble which able to display hardware virtualization support status as Yes, No, Locked On and Locked Off.

Microsoft has also released a application tool that able to detect status of Hardware-Assisted Virtualization (HAV) support on the computer system’s CPU microprocessor. Aptly named as Hardware-Assisted Virtualization Detection Tool or simply as HAV Detection Tool, the utility can detect and check if the computer meets the processor requirements to run Windows Virtual PC, i.e. hardware-assisted virtualization.

Hardware-Assisted Virtualization Detection Tool

Download HAV Detection Tool: havdetectiontool.exe

Using HAV Detection Tool is easy, just run the executable, and the results of whether hardware virtualization support is existed on the system or not (together with ability to install Windows Virtual PC) will be displayed on result dialog. It’s standalone program, thus no installation or uninstallation required.

Enable RemoteApp in Windows XP or Vista To Publish Programs to Windows 7

Windows Virtual PC in Windows 7 features an unique and useful feature which allows virtual applications installed on guest operating system of Windows XP or Windows Vista in the virtual machine to be seamlessly accessed and launched from host Windows 7 desktop as if it’s running on the end user’s local computer. Users can run programs from guest virtual machine side by side with local programs, with full ability to minimize, maximize, and resize the program window, and can easily start multiple programs at the same time.

The seamless applications integration of Windows 7 Virtual PC feature is utilizing RemoteApp technology from Terminal Services (TS). Microsoft includes RemoteApp feature into Windows Virtual PC for Windows 7 to provide application backward compatibility for some programs and software utilities that can only run in Windows XP or Windows Vista.

To convenient Windows 7 users who need to instantly get started running Windows XP productivity applications, Microsoft is providing pre-configured and pre-activated Windows XP virtual machine as in Windows XP Mode. However, some users or administrators may prefer to install their own operating system into the virtual machine as guest OS. In these cases, users who want to use the seamless applications integration feature can download KB961741 or KB961742 RAIL QFE update from Microsoft to enable RemoteApp.

Note that the patch will have to installed in Windows XP SP3 or Windows Vista SP1 or Windows Vista SP2 virtual machine running in Windows Virtual PC in Windows 7. It is is not required for Windows XP Mode image downloaded from Microsoft though, as it’s already been pre-configured.

Download RAIL QFE KB961741 for Windows Vista SP1 or above

Microsoft Download Center: Windows6.0-KB961741-x86.msu

Download RAIL QFE KB961742 for Windows XP SP3

Updated Version:
Microsoft Download Center: KB961742-v3.exe

Older Version:
Microsoft Download Center: KB961742-v3.exe

TechNet and MSDN: en_rail_qfe_for_windows_xp_sp3_x86_439642.exe

Workaround to Install Windows XP Mode in Windows 7 Home Premium and Home Basic

Windows XP Mode (XPM) is a pre-installed and pre-activated licensed copy Windows XP SP3 as guest OS virtual machine package for Windows Virtual PC. Microsoft provides Windows XP Mode as a mean to provide backward compatibility for legacy productivity software. In Windows XP Mode, a pre-installed RemoteApp integration components allow guest applications running within the virtualized environment to be integrated into host Windows 7 desktop, and appear as if running directly on the host, sharing the native desktop and Start Menu of Windows 7 as well as participating in file type associations.

Unfortunately, Windows XP Mode is only available free of charge to users of Windows 7 Professional, Enterprise, and Ultimate editions, as it’s widely considered as buy one free one deal, with a free licensed copy of Windows XP comes with Windows 7. However, Microsoft does provide Windows Virtual PC for every editions of Windows 7 except Windows 7 Starter edition.

Good news is that, according to MDL forum thread, in order to ensure that Windows XP Mode can be run properly without activation worry, Microsoft has embedded the necessary OEM:SLP (System Locked Pre-activation) string in the Windows Virtual PC’s BIOS so that offline OEM activation automatically activate Windows XP Mode. Thus, with the necessary OEM:SLP product key and OEMBIOS files, Windows 7 Home Basic and Windows 7 Home Premium users can manually install Windows XP on Windows Virtual PC guest virtual machine, and perform the steps in the hack below to create a Windows XP Mode with full integration features and functionality.

Tip: The guide can also be used any any editions of Windows 7 to create and install multiple or more than one activated Windows XP as Windows XP Mode with full integration features including seamless application publishing to host.

Hack to Manually Create and Install Windows XP Mode in Windows 7

  1. Ensure that the computer is capable of running Windows Virtual PC, as Windows Virtual PC (and hence Windows XP Mode) required hardware-assisted virtualization. Microsoft also provides Hardware-Assisted Virtualization (HAV) Tool as free download to check the CPU capability.

    Tip: Hardware-assisted virtualization is supported on most CPU processors, but may have disabled or locked in BIOS. In this case, reboot into BIOS to change the setting.

  2. Download and install Windows Virtual PC.

    Note: It’s impossible to download Windows Virtual PC and Windows XP Mode from Microsoft Virtual PC homepage if user selects the operating system as 32-bit or 64-bit Windows 7 Starter, Windows 7 Home Basic or Windows 7 Home Premium.

  3. After installing Windows Virtual PC, browse to Windows Virtual PC folder by clicking on Start menu -> All Programs -> Windows Virtual PC -> Windows Virtual PC.

    A Windows Explorer window showing “Virtual Machines” folder will be opened.

  4. Start the new virtual machine wizard by clicking on Create virtual machine button on the toolbar.
  5. Enter a name for the new virtual machine, such as Windows XP, Windows XP SP3 or simply Windows XP Mode, and then click on Next button.
  6. Specify a value for RAM setting, which allocate size of memory for the virtual machine. By default, it’s 512 MB, but a 256 MB should be enough for Windows XP. Then, click on Next.
  7. Click on Create button to create the new virtual machine.
  8. Insert a Windows XP setup installation CD into the CD/DVD drive disc tray (by default, Windows Virtual PC captures the physical drive for virtual machine to access).

    Alternatively, download Windows XP SP3 ISO, then right click on the VM, select Properties. Go to DVD Drive tab, select Open an ISO image and then browse to locate or specify the full path to the Windows XP ISO image. Click OK when done.

    Note: It’s recommended to use Windows XP Professional, which Windows XP Mode is based of.

  9. Start the virtual machine to start the setup installation of Windows XP. Follow the screen instruction of the setup wizard to install Windows XP.

    Tip: It’s possible to bypass and skip entering a product key during installation of Windows XP SP3. Just leave the product key field blank, and continue with next step of installation after confirming the decision.

  10. After installing Windows XP, click on the Tools menu on VM window, and select Install Integration Components to install Virtual PC Integration Components.

    Click on Continue if prompted with dialog to confirm action to install or update Windows Virtual PC Integration Components. Then follow on-screen instructions of the setup wizard to install the integration components.

  11. Restart the virtual machine after installing integration components.
  12. At the virtual machine’s Tools menu, and select Enable Integration Features, and then specify a user name and password as Windows Security credentials. Click Remember my credentials to let Windows Virtual PC saves the credentials for auto login.

    Note: User is required to specify a user account with a password set as the credentials to automatically log on to the virtual machine. To set a password for a user account, go to Control Panel -> User Accounts, select the user account that wants to use for integration components, and then click on Create a password to set the password.

  13. In order to seamless application integration feature (which allow user to access and run virtualized program installed on virtual machine from host desktop) to work, KB961742 RemoteApp RAIL QFE update package need to be installed. Download and install KB961742 RemoteApp update package inside the Windows XP guest operating system in the virtual machine.
  14. Virtual machine powered with Windows Virtual PC already has OEM:SLP string required for activating Windows XP with OEM activation. Unless you have a Windows XP OEM CD which allows converting Windows XP between retail, volume licensing and OEM channels, download the following package and program:

    Windows XP OEM BIOS Files for Microsoft: Microsoft-B4FFCA38.rar (Source)
    VLK and OEMBIOS Changer: OEMBIOS changer installer.exe (Source)

  15. In the Windows XP guest OS, unpack the content of VLK to OEM Conversion Program (run OEMBIOS_changer_installer.exe) to a folder.
  16. Then unpack the Microsoft-B4FFCA38.rar, and put the four files (oembios.bin, oembios.cat, oembios.dat, oembios.sig) into Uncompressed Oembios Folder of OEMBIOS changer.
  17. Start the VLK to OEM Conversion Program (VLK_to_OEM) by running oem.exe.

    Note: Despite the name, the utility program supports changing of OEMBIOS files in retail, VLK and OEM version of Windows XP.

  18. Press any key to continue from splash screen, then press 5 followed by Enter key to enter “OEMBIOS changer dialog” menu.
  19. Press 3 and followed by Enter key to install the convert the installed Windows XP to OEM version, and install the required OEMBIOS files into the system.
  20. Depending on the edition of Windows XP installed, select the appropriate Windows XP edition to convert by pressing the corresponding number key, followed by Enter.
  21. On the last screen, press Y followed by Enter key to start the OEM conversion.
  22. Answer Y followed by Enter key to restart the computer after the XP system is converted to OEM channel and OEMBIOS files are installed.
  23. After Windows XP system is restarted, it will be automatically activated via OEM activation, as the VLK to OEM converter has also installed a generic Microsoft OEM product key into the system. However, for user who wants the new virtual machine to as identical to Windows XP Mode as possible, change the Windows XP product key to the following product key, which used in Windows XP Mode:

    K49H2-RPR94-QBGG4-DBCTM-YT64G

A virtual machine running Windows XP with full functionality and features of Windows XP Mode is now ready to be used. Here’s the method to check the activation status in Windows XP.

How to Check Windows XP Product Activation Status

Windows XP has less stringent Windows Product Activation algorithm compared with Windows Vista. For example, PC computers from branded OEM (original equipment manufacturer) is activated out-of-factory, and most hackers and pirates go for volume licensing (commonly known as VL or VOL) version of Windows XP Professional which when installed with a volume product key (VLK), does not require user to activate again online or by phone.

However, Windows XP does require product activation too. Doesn’t need (as in the case of when using OEM or VLK product key, which is instantly and automated activated) to perform steps to activate Windows XP doesn’t mean that Windows XP is not activated, and activated Windows XP is one of the requirement for the installed copy of operating system to be considered by genuine by Windows Genuine Advantage (WGA) Validation Tool.

To check, view or verify the Windows XP current activation status, open Run command from Start Menu, and run the following command:

oobe/msoobe /a

A “Activate Windows” dialog window will open to let user know the activation status. If the Windows XP has been activated, the message is “Windows is already activated. Click OK to exit.”

Windows XP is already activated.

Else, you will be asked to let’s activate Windows now, which means that the copy of Windows XP installation is not yet activated.

Enable RemoteApp in Windows XP or Vista To Publish Programs to Windows 7 Virtual PC Host with KB961741 or KB961742 RAIL QFE

Windows Virtual PC in Windows 7 features an unique and useful feature which allows virtual applications installed on guest operating system of Windows XP or Windows Vista in the virtual machine to be seamlessly accessed and launched from host Windows 7 desktop as if it’s running on the end user’s local computer. Users can run programs from guest virtual machine side by side with local programs, with full ability to minimize, maximize, and resize the program window, and can easily start multiple programs at the same time.

The seamless applications integration of Windows 7 Virtual PC feature is utilizing RemoteApp technology from Terminal Services (TS). Microsoft includes RemoteApp feature into Windows Virtual PC for Windows 7 to provide application backward compatibility for some programs and software utilities that can only run in Windows XP or Windows Vista.

To convenient Windows 7 users who need to instantly get started running Windows XP productivity applications, Microsoft is providing pre-configured and pre-activated Windows XP virtual machine as in Windows XP Mode. However, some users or administrators may prefer to install their own operating system into the virtual machine as guest OS. In these cases, users who want to use the seamless applications integration feature can download KB961741 or KB961742 RAIL QFE update from Microsoft to enable RemoteApp.

Note that the patch will have to installed in Windows XP SP3 or Windows Vista SP1 or Windows Vista SP2 virtual machine running in Windows Virtual PC in Windows 7. It is is not required for Windows XP Mode image downloaded from Microsoft though, as it’s already been pre-configured.

Download RAIL QFE KB961741 for Windows Vista SP1 or above

Microsoft Download Center: Windows6.0-KB961741-x86.msu

Download RAIL QFE KB961742 for Windows XP SP3

Updated Version:
Microsoft Download Center: KB961742-v3.exe

Older Version:
Microsoft Download Center: KB961742-v3.exe

TechNet and MSDN: en_rail_qfe_for_windows_xp_sp3_x86_439642.exe

Windows 7 Virtual PC and Windows XP Mode Official Direct Download Links

Windows Virtual PC (VPC) is a new version of Microsoft Virtual PC virtualization software designed specifically for Windows 7. By installing Windows Virtual PC, user can run more than one guest operating systems at the same time inside the virtual machines, or many productivity applications on a virtual Windows environment via RemoteApp, where Windows Virtual PC virtualizes its standard PC and associated hardware.

Together with Windows Virtual PC, Microsoft also releases Windows XP Mode, a virtual machine package for Windows Virtual PC containing a pre-installed, licensed copy of Windows XP SP3 as its guest operating system. Windows XP Mode is pre-installed with integration components and pre-configured to allow user to run the virtual machine immediately right after installed, to provide backward compatibility for legacy productivity software with seamless access from host desktop capability.

While Windows Virtual PC and Windows XP Mode have leaked earlier, Microsoft has officially released Windows Virtual PC and Windows XP Mode as final RTM version for public download, in conjuction with the official public release of Windows 7. Both Windows Virtual PC and Windows XP Mode is available for download from official Windows Virtual PC homepage at http://www.microsoft.com/windows/virtual-pc/download.aspx or from Microsoft Download Center (Windows Virtual PC and Windows XP Mode).

Here’s the direct download links to setup installer of Windows Virtual PC and Windows XP Mode, useful for Windows 7 Starter, Windows 7 Home Basic x86 and x64, and Windows 7 Home Premium x86 and x64 users who are shown the error message of “You are not eligible to download Windows XP Mode. You must have Windows 7 Professional, Enterprise, or Ultimate to run Windows XP Mode. To upgrade visit Windows 7 Anytime Upgrade” when trying to download Windows Virtual PC and/or Windows XP Mode, or, users who fail to pass Windows Genuine Advantage (WGA) validation.

Windows Virtual PC Direct Download Links

32-bit (x86): Windows6.1-KB958559-x86.msu
64-bit (x64): Windows6.1-KB958559-x64.msu

Windows XP Mode Direct Download Links

English: WindowsXPMode_en-us.exe
Arabic: WindowsXPMode_ar-sa.exe
Chinese (Hong Kong): WindowsXPMode_zh-hk.exe
Chinese (Simplified): WindowsXPMode_zh-cn.exe
Chinese (Traditional): WindowsXPMode_zh-tw.exe
Czech: WindowsXPMode_cs-cz.exe
Danish: WindowsXPMode_da-dk.exe
Dutch: WindowsXPMode_nl-nl.exe
Finnish: WindowsXPMode_fi-fi.exe
French: WindowsXPMode_fr-fr.exe
German: WindowsXPMode_de-de.exe
Greek: WindowsXPMode_el-gr.exe
Hebrew: WindowsXPMode_he-il.exe
Hungarian: WindowsXPMode_hu-hu.exe
Italian: WindowsXPMode_it-it.exe
Japanese: WindowsXPMode_ja-jp.exe
Korean: WindowsXPMode_ko-kr.exe
Norwegian: WindowsXPMode_nb-no.exe
Polish (Poland): WindowsXPMode_pl-pl.exe
Portuguese (Brazil): WindowsXPMode_pt-br.exe
Portuguese (Portugal): WindowsXPMode_pt-pt.exe
Russian: WindowsXPMode_ru-ru.exe
Spanish: WindowsXPMode_es-es.exe
Swedish: WindowsXPMode_sv-se.exe
Turkish: WindowsXPMode_tr-tr.exe

Windows XP Mode N, KN and KN Edition Direct Download Links

Czech N: WindowsXPMode_N_cs-cz.exe
Danish N: WindowsXPMode_N_da-dk.exe
Dutch N: WindowsXPMode_N_nl-nl.exe
English N: WindowsXPMode_N_en-us.exe
Finnish N: WindowsXPMode_N_fi-fi.exe
French N: WindowsXPMode_N_fr-fr.exe
German N: WindowsXPMode_N_de-de.exe
Greek N: WindowsXPMode_N_el-gr.exe
Hungarian N: WindowsXPMode_N_hu-hu.exe
Italian: WindowsXPMode_N_it-it.exe
Norwegian N: WindowsXPMode_N_nb-no.exe
Polish N: WindowsXPMode_N_pl-pl.exe
Portuguese N (Portugal): WindowsXPMode_N_pt-pt.exe
Spanish N: WindowsXPMode_N_es-es.exe
Swedish N: WindowsXPMode_N_sv-se.exe
Korean K: WindowsXPMode_K_ko-kr.exe
Korean KN: WindowsXPMode_KN_ko-kr.exe

Note that Windows Virtual PC requires hardware-assisted virtualization, where Microsoft provides HAV tool to check if system supports hardware-assisted virtualization.

To enable seamless integration of applications between guest and host operating system, RemoteApp update package has to be installed on virtual machine. In addition, Windows XP Mode only can be installed on Windows 7 Ultimate, Enterprise and Professional edition, but there is a hack to install Windows XP Mode on Windows 7 Home Premium and Home Basic.

The documentations for Windows Virtual PC is also available, namely Windows Virtual PC Tips (Windows Virtual PC Tips.pdf) and Windows Virtual PC Evaluation Guide (VirtualPC_Eval_Guide.doc)

Hide and Remove Logical Drives in Computer and Windows Explorer (NoDrives)

Each disk drive or partition volume of permanent built-in hard disk or plugged-in external USB portable hard disk or removable USB flash drive storage medium is a logical drive which has a visible drive letter which allows user to access the drive through Windows Explorer or My Computer.

Windows operating system such as Windows 7, Windows Vista, Windows XP and Windows Server has the ability to control which drives that are visible in My Computer or Windows Explorer folder tree, by hiding and removing the selected drives or all drivers (together with their icons and drive letters) from all folder tree view of Explorer and My Computer drive listing. The invisible drives can still be accessed, opened and explored by directly typing the drive letter in Location Bar.

  1. Run Registry Editor (RegEdit).
  2. Navigate to one of the following registry key.

    To change for current logged on user only:

    HKEY_CURRENT_USER\Software\Microsoft\Windows\CurrentVersion\Policies\Explorer

    To change to all users system-wide:

    HKEY_LOCAL_MACHINE\Software\Microsoft\Windows\CurrentVersion\Policies\Explorer

  3. Right click on blank space on the right pane, select New -> DWORD (32-bit) Value to create a new REG_DWORD registry entry. Name the new registry value as NoDrives.
  4. NoDrives registry value uses a mathematical hexadecimal numeric value to define local, removable storage device and network drive visibility to determine whether to hide or show logical drive in the computer. The lower 26 bits of the 32-bit registry value are corresponding and representing drive letters from A to Z, and by setting its value to 0, the drive will be unhidden and visible, while with value of 1, the drive is hidden and invisible.

    To make the work for excluding the drive from view in Windows Explorer easier, just enter the sum of decimal value for hidden drive of all drives that want to make hidden. The respective decimal values for each drive letter are as follow:

    A: 1 B: 2 C: 4 D: 8
    E: 16 F: 32 G: 64 H: 128
    I: 256 J: 512 K: 1024 L: 2048
    M: 4096 N: 8192 O: 16384 P: 32768
    Q: 65536 R: 131072 S: 262144 T: 524288
    U: 1048576 V: 2097152 W: 4194304 X: 8388608
    Y: 16777216 Z: 33554432

    All Drives: 67108863

    For example, to hide drive C and drive D, add the numeric values of 4 (for drive C) and 8 (for drive D), which equals to 12. As such, set the value date of NoDrives to 12 to hide drive C and D from Explorer view.

    To make all drives hidden, set value date of NoDrives to 67108863.

    Note: Remember to set the Base as Decimal when entering the value above

  5. Restart the computer for the setting to take effect.

Alternatively, there is a “NoDrives Manager” (NoDrvMan) software utility that can automatically hide Windows logical drives by modifying the registry. What user needs to do with NoDrives program is just to select and tick the drive letters to make hidden. NoDrives Manager to allow users to set a password protection to prevent unauthorized user to run the program and re-enable the hidden drives.

Download NoDrives Manager from sourceforge.net.

Note: The hidden drives will still appear in File Manager. To remove File Manager, delete or rename winfile.exe.

How to Disable and Stop Windows Live Messenger from Loading at Startup Automatically (Auto Start)

After installing Windows Live Messenger (WLM), which previously known as MSN Messenger, the messenger instant messaging client will automatically start and load itself on Windows startup. Autostart of Windows Live Messenger allows frequent users or IM addicts to quickly sign onto the WL Messenger service to chat with friends and contacts.

Loading and starting the Windows Live Messenger when Windows starts slow down the startup process, and for people who seldom or rarely uses the Windows Live Messenger client, letting the program runs at the background waste valuable system resources. Here’s how to disable and turn off auto-start of Windows Live Messenger to forbid, prevent and stop Windows Live Messenger to automatically starts up.

  1. Open Windows Live Messenger window (sign into Messenger if you haven’t do so).
  2. Press Alt key to reveal menu bar, then click on Tools and select Options. It’s also possible to click on Show menu icon after the “Search contacts or the web” box.

    Alternatively, click on the logged on contact’s name on the top of the Messenger client window, and select Options.

  3. Select General (earlier version of WLM) or Sign In (current latest version of WLM) on the left pane.
  4. Deselect and uncheck the Automatically run Windows Live Messenger when I log on to Windows check box.
  5. Click OK.

Windows Live Messenger will not start itself automatically from next system boot up. User will need to start the program manually from Start Menu.

Workaround to Install Windows XP Mode in Windows 7 Home Premium and Home Basic

Windows XP Mode (XPM) is a pre-installed and pre-activated licensed copy Windows XP SP3 as guest OS virtual machine package for Windows Virtual PC. Microsoft provides Windows XP Mode as a mean to provide backward compatibility for legacy productivity software. In Windows XP Mode, a pre-installed RemoteApp integration components allow guest applications running within the virtualized environment to be integrated into host Windows 7 desktop, and appear as if running directly on the host, sharing the native desktop and Start Menu of Windows 7 as well as participating in file type associations.

Unfortunately, Windows XP Mode is only available free of charge to users of Windows 7 Professional, Enterprise, and Ultimate editions, as it’s widely considered as buy one free one deal, with a free licensed copy of Windows XP comes with Windows 7. However, Microsoft does provide Windows Virtual PC for every editions of Windows 7 except Windows 7 Starter edition.

Good news is that, according to MDL forum thread, in order to ensure that Windows XP Mode can be run properly without activation worry, Microsoft has embedded the necessary OEM:SLP (System Locked Pre-activation) string in the Windows Virtual PC’s BIOS so that offline OEM activation automatically activate Windows XP Mode. Thus, with the necessary OEM:SLP product key and OEMBIOS files, Windows 7 Home Basic and Windows 7 Home Premium users can manually install Windows XP on Windows Virtual PC guest virtual machine, and perform the steps in the hack below to create a Windows XP Mode with full integration features and functionality.

Tip: The guide can also be used any any editions of Windows 7 to create and install multiple or more than one activated Windows XP as Windows XP Mode with full integration features including seamless application publishing to host.

Hack to Manually Create and Install Windows XP Mode in Windows 7

  1. Ensure that the computer is capable of running Windows Virtual PC, as Windows Virtual PC (and hence Windows XP Mode) required hardware-assisted virtualization. Microsoft also provides Hardware-Assisted Virtualization (HAV) Tool as free download to check the CPU capability.

    Tip: Hardware-assisted virtualization is supported on most CPU processors, but may have disabled or locked in BIOS. In this case, reboot into BIOS to change the setting.

  2. Download and install Windows Virtual PC.

    Note: It’s impossible to download Windows Virtual PC and Windows XP Mode from Microsoft Virtual PC homepage if user selects the operating system as 32-bit or 64-bit Windows 7 Starter, Windows 7 Home Basic or Windows 7 Home Premium.

  3. After installing Windows Virtual PC, browse to Windows Virtual PC folder by clicking on Start menu -> All Programs -> Windows Virtual PC -> Windows Virtual PC.

    A Windows Explorer window showing “Virtual Machines” folder will be opened.

  4. Start the new virtual machine wizard by clicking on Create virtual machine button on the toolbar.
  5. Enter a name for the new virtual machine, such as Windows XP, Windows XP SP3 or simply Windows XP Mode, and then click on Next button.
  6. Specify a value for RAM setting, which allocate size of memory for the virtual machine. By default, it’s 512 MB, but a 256 MB should be enough for Windows XP. Then, click on Next.
  7. Click on Create button to create the new virtual machine.
  8. Insert a Windows XP setup installation CD into the CD/DVD drive disc tray (by default, Windows Virtual PC captures the physical drive for virtual machine to access).

    Alternatively, download Windows XP SP3 ISO, then right click on the VM, select Properties. Go to DVD Drive tab, select Open an ISO image and then browse to locate or specify the full path to the Windows XP ISO image. Click OK when done.

    Note: It’s recommended to use Windows XP Professional, which Windows XP Mode is based of.

  9. Start the virtual machine to start the setup installation of Windows XP. Follow the screen instruction of the setup wizard to install Windows XP.

    Tip: It’s possible to bypass and skip entering a product key during installation of Windows XP SP3. Just leave the product key field blank, and continue with next step of installation after confirming the decision.

  10. After installing Windows XP, click on the Tools menu on VM window, and select Install Integration Components to install Virtual PC Integration Components.

    Click on Continue if prompted with dialog to confirm action to install or update Windows Virtual PC Integration Components. Then follow on-screen instructions of the setup wizard to install the integration components.

  11. Restart the virtual machine after installing integration components.
  12. At the virtual machine’s Tools menu, and select Enable Integration Features, and then specify a user name and password as Windows Security credentials. Click Remember my credentials to let Windows Virtual PC saves the credentials for auto login.

    Note: User is required to specify a user account with a password set as the credentials to automatically log on to the virtual machine. To set a password for a user account, go to Control Panel -> User Accounts, select the user account that wants to use for integration components, and then click on Create a password to set the password.

  13. In order to seamless application integration feature (which allow user to access and run virtualized program installed on virtual machine from host desktop) to work, KB961742 RemoteApp RAIL QFE update package need to be installed. Download and install KB961742 RemoteApp update package inside the Windows XP guest operating system in the virtual machine.
  14. Virtual machine powered with Windows Virtual PC already has OEM:SLP string required for activating Windows XP with OEM activation. Unless you have a Windows XP OEM CD which allows converting Windows XP between retail, volume licensing and OEM channels, download the following package and program:

    Windows XP OEM BIOS Files for Microsoft: Microsoft-B4FFCA38.rar (Source)
    VLK and OEMBIOS Changer: OEMBIOS changer installer.exe (Source)

  15. In the Windows XP guest OS, unpack the content of VLK to OEM Conversion Program (run OEMBIOS_changer_installer.exe) to a folder.
  16. Then unpack the Microsoft-B4FFCA38.rar, and put the four files (oembios.bin, oembios.cat, oembios.dat, oembios.sig) into Uncompressed Oembios Folder of OEMBIOS changer.
  17. Start the VLK to OEM Conversion Program (VLK_to_OEM) by running oem.exe.

    Note: Despite the name, the utility program supports changing of OEMBIOS files in retail, VLK and OEM version of Windows XP.

  18. Press any key to continue from splash screen, then press 5 followed by Enter key to enter “OEMBIOS changer dialog” menu.
  19. Press 3 and followed by Enter key to install the convert the installed Windows XP to OEM version, and install the required OEMBIOS files into the system.
  20. Depending on the edition of Windows XP installed, select the appropriate Windows XP edition to convert by pressing the corresponding number key, followed by Enter.
  21. On the last screen, press Y followed by Enter key to start the OEM conversion.
  22. Answer Y followed by Enter key to restart the computer after the XP system is converted to OEM channel and OEMBIOS files are installed.
  23. After Windows XP system is restarted, it will be automatically activated via OEM activation, as the VLK to OEM converter has also installed a generic Microsoft OEM product key into the system. However, for user who wants the new virtual machine to as identical to Windows XP Mode as possible, change the Windows XP product key to the following product key, which used in Windows XP Mode:

    K49H2-RPR94-QBGG4-DBCTM-YT64G

A virtual machine running Windows XP with full functionality and features of Windows XP Mode is now ready to be used. Here’s the method to check the activation status in Windows XP.

How To Increase Color Depth and Quality of Windows XP Accessed Via Remote Desktop or Terminal Services

When a Windows XP system is accessed via Remote Desktop or Terminal Services connection, the default maximum color resolution (color depth or color quality) is set to 16-bit on Windows XP. The color depth is limited in order to improve connection performance especially on slow link, and reduce server load.

In Windows XP era, high quality of video display of remote computer or remote virtual machine over a Remote Desktop or Terminal Services connection is probably not important or makes no difference. However, with the advance of high definition graphics display, connect to a Windows XP system on 16-bit color quality will make some colors to appear strange, or not properly drew.

It’s possible to increase and up the limit on the color depth of any connection to a Terminal Server or Remote Desktop Server via Remote Desktop Services session. Changing the color depth or color quality allowed over Remote Desktop or Terminal Services connection is useful especially in the case of Windows XP Mode which can be used to run virtualized apps such as IE6 natively on Windows 7 host desktop, where Windows 7 host connect to the virtual machine via Remote Desktop Protocol (RDP).

Tip: If you’re trying to change the color depth limit on Windows XP Mode, click on Tools menu of the virtual machine window, and select Disable Integration Features before continuing with the procedure. After changing the maximum color depth limit, re-enable the integration features.

  1. In the Windows XP operating system (remote system), click on Start menu, then Run.
  2. Type GPEdit.msc to open Group Policy Editor.
  3. Navigate to Local Computer Policy -> Computer Configuration -> Administrative Templates -> Windows Components -> Terminal Services.
  4. In the right pane, double-click on the Limit Maximum Color Depth setting.
  5. In the Properties dialog, select radio button of Enabled, and then set Color Depth value to 24 bit or Client Compatible.
  6. Click OK when done.
  7. Restart the computer.

The steps to allow Remote Desktop and Terminal Services connection to connect at higher color depth is basically done. However, for users who are connecting to Windows XP in virtual machine (such as Windows XP Mode) should check that the Color Quality setting should be set to 24-bit or 32-bit color in high screen resolution.

Speed Up and Optimize USB Drive Speed Performance by Enabling Write Caching

USB (Universal Serial Bus) has became standard connection method for many devices and the host computer. Many computer peripherals make use of USB connection to establish communication linkage between device and host controllers, and these devices include removable storage device such as USB flash drives, pen drives, memory keys, thumbdrives, external or portable hard disk drives.

By default, Windows operating system is optimizing the connected the removable storage device, including USB-connected storage devices for quick removal. By optimizing a storage device for quick removal, it means Windows disables write-caching to the external drives so that the external drives can be quickly plugged out without using the Safe Removal icon.

For users facing with problem of slow copying, reading or accessing speed when connecting to and using the external USB hard disk drives or USB flash drives or other USB storage devices, Windows allows the externally connected removable disk storage devices via SCSI, USB, IEEE 1394 Firewire, eSATA interface to be optimized for performance (enable and turn on disk write caching) to improve access and write speed to and from the drive.

To optimize a storage drive for performance, follow these steps (based on Windows 7, other Windows OSes, such as Windows XP or Windows Vista has about the same procedure):

  1. Click on Start button, and go to Control Panel.
  2. Click on System and Security category, and then Device Manager link.
  3. Click Yes if User Account Control (UAC) dialog prompts.
  4. Expand the Disk Drive tree.
  5. Right click on the USB storage disk drive to improve its performance, and select Properties.
  6. Go to Policies tab.
  7. Select the radio button for Better performance or Optimize for performance.
  8. Click OK.

The external drive is now write-caching enabled. Thus, user must use the Safely Remove Hardware notification icon to disconnect the drive safely prior to remove the device in order to avoid data loss.

How to Open the Local Group Policy Editor in Windows 7 and Vista

Local Group Policy Editor is a Microsoft Management Console (MMC) snap-in that provides a single user interface through which all the settings of Local Group Policy objects (GPO) of the computers can be managed. The Local Group Policy objects include settings for Computer Configuration, where the policies are applied to whole computer regardless of logged-on users, and User Configuration, where policies are applied to currently logged-on user across all computers (for users on domain).


In order to view, edit, manage, change, delete or manipulate software settings, Windows settings and administrative templates of Local Group Policy Objects, it’s easier to do so via Local Group Policy Editor. User can open the Local Group Policy Editor by using the command line or by using the Microsoft Management Console (MMC).

Note: User must be an administrator in order to open the Local Group Policy Editor.

Method 1: Open Local Group Policy Editor from Command Prompt

Click on Start button, type gpedit.msc in the Start Search box, and then press ENTER. Press Yes if User Account Control (UAC) dialog prompts.

Tip: gpedit.msc file is located in \Windows\System32 folder.

Method 2: Open the Local Group Policy Editor as MMC Snap-In

  1. Click on Start button, type mmc in the Start Search box, and then press ENTER to open MMC (Microsoft Management Console).
  2. Press Yes if User Account Control (UAC) dialog prompts.
  3. On the File menu, click Add/Remove Snap-in.
  4. In the “Add or Remove Snap-ins” dialog box, click Group Policy Object Editor, and then click Add.

  5. In the “Select Group Policy Object” dialog box, click Browse.
  6. Click This computer to edit the Local Group Policy object.

    Alternatively, user can choose to connect to GPO of remote computer, or click Users tab to selectively edit GPO for Administrator, Non-Administrator, or per-user Local Group Policy objects.

  7. Click Finish.
  8. Click OK to open the Local Group Policy Editor.
  9. Local Group Policy Editor is only available in Professional (Business), Enterprise and Ultimate Editions of Windows 7 and Windows Vista. Users of Windows 7 or Windows Vista Starter, Home Basic and Home Premium will not get Local Group Policy Editor.

How to Manually Identify Find Unknown Devices Drivers with Vendor and Device ID

With each newer and better version of Windows operating system such as Windows 7 and Windows Vista been released, more device drivers been included in out-of-the-box operating system setup installation files so that user does not have to deal with cumbersome tasks of having to find, download and install device devices for hundreds of hardware and peripheral devices on computer.

Nonetheless, there are still some non-popular or proprietary devices which drivers does not get installed automatically by Windows, especially on earlier or older versions of Windows OS such as Windows XP, Windows 2000, Windows Me or Windows 9x. When Windows fails to recognize or identify the device, or does not have the driver for the device, the device will be listed as Unknown Device in Device Manager, where a list of all devices that are installed on the computer are listed and shown.

Unknown Device is labeled with a yellow question mark or just question mark as its icon, and belongs to Other Devices in Device Manager. According to KB314464, there are many causes that result in an device became unknown device status, including:

  • The device does not have a device driver.
  • Wrong type of device driver file, such as using virtual device driver (.vxd) files that are common to Windows 98 or to Windows 95 drivers in Windows XP.
  • Unrecognized device ID.
  • Faulty hardware or firmware.

In order to fix and resolve a unknown device status which causes the device cannot be used or functioned is to download and install proper and correct device driver for the device from manufacturer’s or vendor’s support website. But in order to download or find the correct device driver, the device has to be correctly and accurately identify and recognize the type, name, make or brand of the device.

Here’s a guide on how to manually identify and find the brand or make name of the device, thanks to the fact that every hardware device has a special identifier that is used by Plug and Play. This identifier can include several different types, such as vendor ID, device ID, subsystem ID, subsystem vendor ID, or revision ID. It’s possible to use both Device Manager or System Information Tool (MSInfo32) to view the hardware identifier information.

System Information Tool

  1. Click Start and type msinfo32 into Start Search box and hit Enter (Or click Run, type msinfo32, and then click OK in Windows XP).
  2. Expand Components, and then go to Problem Devices branch.
  3. A list of the devices that are installed on your computer that may have a problem is displayed in the details pane, as follows:
    • The Device column lists the common name for the device, or the name of the device driver associated with it.
    • The PNP Device ID column lists device IDs, such as Peripheral Component Interconnect (PCI) ID, ISA ID, an ID for some other bus type, or an unknown type.
    • The Error Code column lists the error code associated with this specific problem. Frequently, the Device Manager error code helps determine what created the unknown device. For example, if your computer generates a “Bad or missing device driver” error message, three types of entries may be listed under Problem Devices, depending on the device type:

      PCI PnP Device ID:
      Device Name | PCI\VEN_00000&DEV_0000&SUBSYS_00000000&REV_00\0&0000 | Error code

      ISA PnP ID:
      Device Name | ?\PNP0000\0

      Bad or Incompatible Device Driver:
      Device Name | ROOT\UNKNOWN\0000

  4. Depending on device, the unique hardware identifier can be shown in PNP Device ID or in Error Code, and should look similar to the alphanumeric string below:

    PCI\VEN_1180&DEV_0832&SUBSYS_30CC103C&REV_05

  5. From the device identification marker for the device above, VEN prefix is the Vendor ID, and DEV prefix is the Device ID, which means Device ID is 1180 and Device ID is 0832, as an example.
  6. Visit the PCI Database website at http://www.pcidatabase.com/, an user-supported centralized database of PCI device IDs.
  7. Search vendor name, chip number and chip description with either Vendor ID or Device ID.
  8. With the vendor name or manufacturer name found, visit the support website to search and download latest version of device driver for the corresponding device driver. Or else just search in Google.

For unknown devices which does not listed in the Problem Devices of System Information tool, Device Manager can be used to idenfity the vendor ID and device ID.

  1. Open Device Manager by:
    • Type Device Manager in Start Search box of Windows Vista or Windows 7
    • Type devmgmt.msc in the Run box of Windows XP
    • Click on Start -> Control Panel -> Performance and Maintenance -> System, then go to Hardware tab and click Device Manager in Windows XP
    • Click on Start button -> Control Panel -> System and Security -> System, and click Device Manager in Windows 7.
  2. Locate the unknown device to identify its identity (typically grouped under Other devices category).
  3. Right click on the unknown device and select Properties.
  4. Go to Details tab.
  5. Select Device Instance Id or Hardware Ids (for Windows 7) from the “Property” drop down menu.
  6. Alphanumeric strings similar to below will be shown:

    PCI\VEN_10DE&DEV_0427&SUBSYS_30CC103C&REV_A1

    The string is the unique identifier for the hardware device. From the device identification marker for the device above, VEN prefix is the Vendor ID, and DEV prefix is the Device ID, which means Device ID is 10DE and Device ID is 0427, as an example.

  7. Visit the PCI Database website at http://www.pcidatabase.com/, an user-supported centralized database of PCI device IDs.
  8. Search vendor name, chip number and chip description with either Vendor ID or Device ID.
  9. With the vendor name or manufacturer name found, visit the support website to search and download latest version of device driver for the corresponding device driver. Or else just search in Google